Key Takeaways
- A thoughtfully designed cake smash studio — from sealed flooring to soft directional lighting — is what separates a forgettable snap from a keepsake family heirloom.
- Safety and timing are just as important as aesthetics: a hazard-free shoot zone and a well-rested toddler are the real secrets behind those genuinely joyful expressions.
- Communicating clearly with parents before the session — outfit choices, cake briefing, nap schedules — dramatically improves consistency and cuts stress on the day.
Why the Studio Environment Makes All the Difference
First birthday photos aren't just documentation — they're the images families will print, frame, and pull out at every milestone for decades. The studio environment shapes those images before a single shutter click. A well-considered cake smash studio setup does three things simultaneously:- Controls light so expressions read clearly and skin tones glow warmly.
- Manages mess so cleanup doesn't eat into the next session's time.
- Keeps the child comfortable so genuine, unforced reactions have space to emerge.
Studio Surfaces That Actually Work
Flooring That's Both Photogenic and Practical
Your flooring choice will determine whether cleanup takes ten minutes or two hours. Sealed concrete or polished epoxy is the clear winner — it wipes down in minutes, photographs as a clean neutral plane, and doesn't trap frosting in grout lines the way tile does. If you're working with existing floors, large washable vinyl mats solve most problems. Position them under your shoot area to corral the mess and create a visually consistent surface in-camera. Textured matte surfaces photograph better than high-gloss ones — they catch light naturally without introducing distracting reflections that pull the eye away from your little subject's face.Backdrops That Age Well
Keep backgrounds simple. Solid matte surfaces in white, soft grey, or gentle pastel tones are the standard for good reason — they don't compete with the child or the cake, and they won't look dated when the family opens that album in fifteen years. Avoid busy patterns, high-contrast graphics, or hyper-saturated backdrops. A quality fabric or banner backdrop costing between $30 and $80 gives you flexibility without committing to a permanent paint colour. Swap it out seasonally, match it to the cake's palette, and the images always feel cohesive.Lighting That Reveals Every Genuine Expression
Soft and Directional — Always
Hard overhead lighting is the enemy of a great cake smash image. It carves unflattering shadows under tiny eyes, flattens facial dimension, and gives skin an unnatural quality that no amount of post-processing fully fixes. Two softboxes positioned at roughly 45-degree angles, three to four feet out from the subject, transform the result immediately. Shadows soften, the child's expression pops, and you catch those precious split-second reactions — the first tentative finger swipe through frosting, the squinted look of utter disbelief at the sugar on their hand.Colour Temperature and Natural Light
Aim for a warm colour temperature around 3200K. It renders skin tones honestly and makes the cake's colours sing without the plastic quality that cooler light produces. If you're fortunate enough to have access to beautiful window light, use it — but avoid direct midday sun, which creates harsh squinting and uneven exposure across the set. Most professional studios favour continuous LED lighting over flash for cake smash work. Babies aren't startled by the constant glow, and you can adjust in real time without gambling on whether the flash fired at the exact right moment. The investment pays off immediately in consistency. For deeper guidance on building your lighting setup, our post on lighting equipment studio essentials covers the professional approach in detail.Selecting and Styling the Cake
The Cake Is the Co-Star
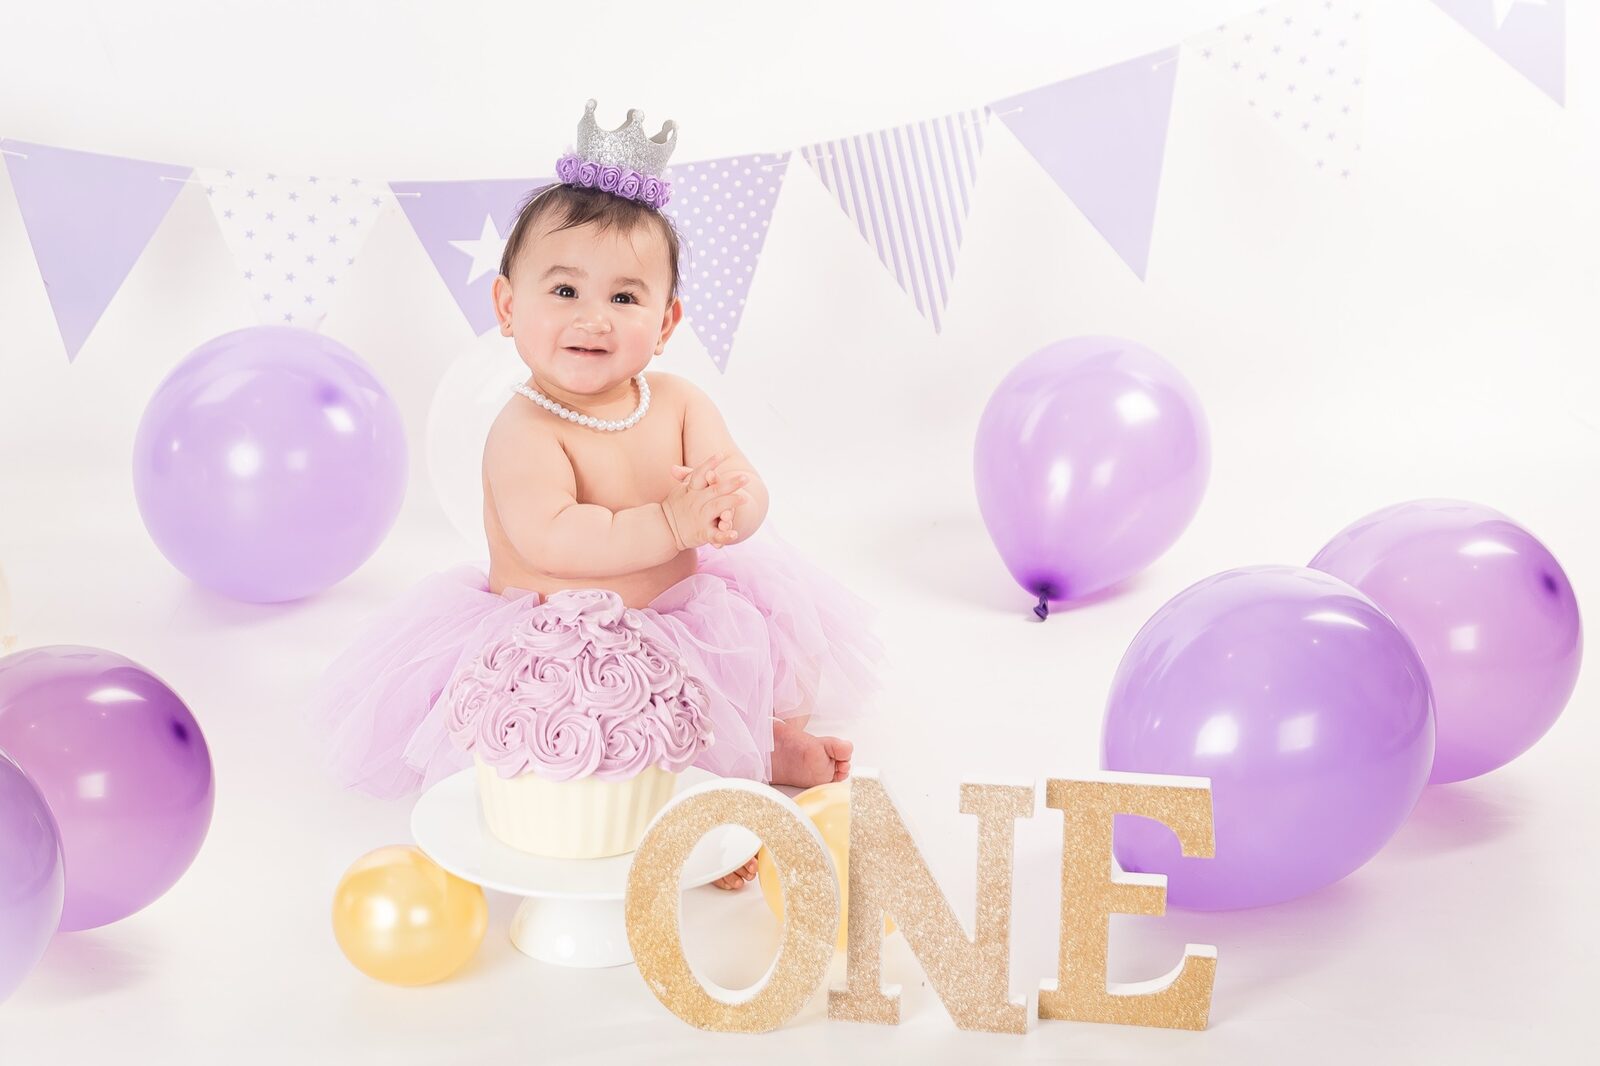
The cake is doing a lot of creative work in these images. Its colour, size, and frosting texture all directly affect what the final photographs look like — so it deserves careful thought. A 15 to 20-centimetre round cake is typically the right size. Large enough to make a visual impact, small enough that a one-year-old can actually engage with it rather than being dwarfed by it. Matte or lightly textured buttercream photographs beautifully — it shows finger marks, smears, and the natural chaos of a baby exploring food in a way that shiny fondant simply doesn't.Colour Coordination
Brief the family's baker on the studio backdrop and prop palette. A pastel-blue cake works brilliantly against soft grey and white; a coral cake pops against a warm cream background. Clashing colours create visual noise that draws attention away from the child's expression — exactly what you don't want. Avoid neon colours, heavy fondant decorations, or cakes with sharp structural elements. Simple, clean, and coordinated produces the most striking images. For outfit inspiration that ties everything together, see our guide on cake smash outfits and dressing for a playful first birthday."The gap between a mediocre cake smash and one that becomes genuine family lore is almost entirely preparation — ruthless, loving, borderline obsessive preparation."
Props That Enhance Without Overwhelming
Less Is Always More
One well-chosen prop beats five mediocre ones scattered across the set. The cake is the star of this production. Everything else — every banner, every wicker basket, every wooden name sign — is supporting cast. Their job is to add context and warmth, not to compete.- A simple wooden name sign or initial letter adds a personalised touch without cluttering the frame.
- A small neutral-coloured chair or low stool provides visual anchoring and gives the child something to hold as they find their balance.
- Lightweight fabric bunting or a simple balloon cluster echoes the celebratory feel without introducing sharp edges or choking hazards.
Sourcing Props Wisely
Thrift shops, craft stores, and local markets in the Campbelltown and Camden areas often yield more characterful finds than generic "cake smash package" bundles. Authentic, slightly imperfect pieces photograph with warmth that mass-produced props rarely achieve. Critically — and this cannot be overstated — check every prop for sharp edges and small detachable pieces. A one-year-old will put absolutely anything into their mouth, and your studio should operate as though that's a certainty, not a possibility.Ready to book your little one's cake smash session?
Our studios in Glen Alpine and Gledswood Hills are fully set up for unforgettable first birthday sessions — mess, magic, and all. Serving families across South-West Sydney and the Macarthur region.
Safety, Timing, and Parent Communication
Creating a Hazard-Free Shoot Zone
Safety is the first act — not the footnote. Before the family arrives, walk the set as though you are a curious, fearless one-year-old with unlimited energy and zero risk assessment. Remove anything with a sharp edge. Remove anything with a small detachable part. Remove anything that looks remotely chewable and isn't food-safe. Use only non-toxic, food-safe materials within reach of the child or the cake. Babies eat everything — frosting, props, backdrop fabric, the photographer's shoelace. Your studio setup should account for this cheerfully. Keep the floor dry and non-slip. Frosting on sealed concrete is essentially a tiny ice rink, and a crying child with a bumped head is not the memory anyone signed up for. Cordon the shoot area so well-meaning parents don't wander into the backdrop while you're adjusting a reflector. Have one helper — ideally someone the child already knows and trusts — just outside the frame. They can hold attention, redirect a determined crawler, offer a consolation snack if the emotional weather turns, and generally act as a calm counterweight to the chaos. And this is non-negotiable: never leave a child unattended on any elevated surface, even for five seconds.Scheduling for Success
Timing with toddlers is everything — and with tired, overstimulated toddlers, timing is tyranny. The best cake smash sessions happen when the child is:- Well-rested (ideally shortly after their regular morning nap).
- Slightly hungry but not distressed — curious about the cake, not desperate for it.
- Freshly changed and comfortable in their outfit.
- Familiar enough with the space to have had a few minutes of gentle exploration first.
Pre-Session Briefing for Parents
Send families a simple briefing document a week before their session. Cover outfit selection (our cake smash outfit guide is a great companion resource here), the cake brief, nap timing, what to bring as a backup snack, and what to realistically expect emotionally from a one-year-old meeting cake for the first time. Parents who arrive prepared are calmer. Calm parents produce calmer children. Calmer children produce better images. It's a simple equation — invest the time in the briefing, and it pays back tenfold on shoot day.What Sets a Professional Studio Apart
There's a meaningful difference between a cake smash done at home on a kitchen floor and one executed in a purpose-built professional studio. It's not about snobbery — it's about control. Control over light, over surface, over safety, over timing, over everything that turns a pleasant first-birthday ritual into a genuinely beautiful visual record. Our Glen Alpine studio and our Gledswood Hills location are both purpose-designed for exactly this kind of session. The flooring, the lighting infrastructure, the prop library, the safety protocols — every element has been refined across hundreds of sessions with families from Campbelltown and the wider Macarthur region. A professional studio also means someone else is doing the cleanup. Which, after a thorough cake smash, is genuinely not a small thing.Beyond the Cake Smash: Extending the Milestone Memories
The first birthday is one milestone in a much longer story. Many families who start with a cake smash session go on to book family photoshoots in Sydney as their children grow — capturing the evolving dynamics of siblings, extended family, and all the wonderful chaos that comes with it. If you're expecting another little one, our newborn photography in Sydney sessions are designed with the same intentional care as every cake smash we shoot. And for families planning something larger — grandparents, cousins, the full extended crew — we'd love to chat about what's possible.Frequently Asked Questions
What is included in a cake smash studio setup at Faithful Photography?
Our cake smash sessions include a fully styled set with coordinated backdrop, props, and professional studio lighting. We provide guidance on cake selection and outfit choices beforehand, and our studio flooring is designed for easy cleanup so you can focus entirely on enjoying the experience. Visit our cake smash photography page for full session details.
Do I need to bring the cake, or does the studio provide one?
Families typically bring their own cake, baked to a brief we provide. We recommend a simple round buttercream cake in a colour coordinated with your chosen backdrop and outfit palette — usually between 15 and 20 centimetres. We'll share our full cake brief when you book so your baker has exactly what they need.
What's the best time of day to schedule a cake smash session?
Mid-morning — shortly after your child's usual nap and before they become tired or hungry — typically produces the best results. A rested, slightly peckish toddler who hasn't encountered cake before is genuinely the ideal subject. We'll discuss your child's routine when you enquire so we can schedule accordingly.
Is a cake smash session safe for a one-year-old?
Absolutely — when executed in a properly managed professional studio environment. We remove all props with sharp edges or small detachable parts before the session, use only food-safe materials near the child and cake, maintain non-slip flooring, and always have a helper available just outside the frame. Your child's safety is genuinely our first consideration, before aesthetics, before lighting, before everything.
Can siblings or parents be included in the cake smash session?
Yes — and we encourage it. Some of the most treasured images from a cake smash session are the ones where an older sibling sneaks a taste, or where a parent's expression of delighted disbelief makes it into the frame. Let us know when booking if you'd like to include family members, and we'll factor this into the session structure.
Where are your cake smash studios located, and which areas do you serve?
We operate from two studios — Glen Alpine and Gledswood Hills — and serve families across South-West Sydney and the Macarthur region, including Campbelltown, Camden, Narellan, Harrington Park, Gregory Hills, Mount Annan, Oran Park, and Liverpool, NSW. If you're unsure whether we cover your area, please get in touch — we'd love to help.
Visit Faithful Photography Today
Your little one's first birthday deserves more than a snapshot — it deserves a beautifully designed, professionally lit cake smash session that your family will treasure for decades. Our studios in Glen Alpine and Gledswood Hills are ready for the mess, the magic, and every expression in between. Reach out today and let's start planning something wonderful.