Key Takeaways
- The right cake smash birthday cake needs structural integrity, the correct size, and baby-safe ingredients — not just good looks.
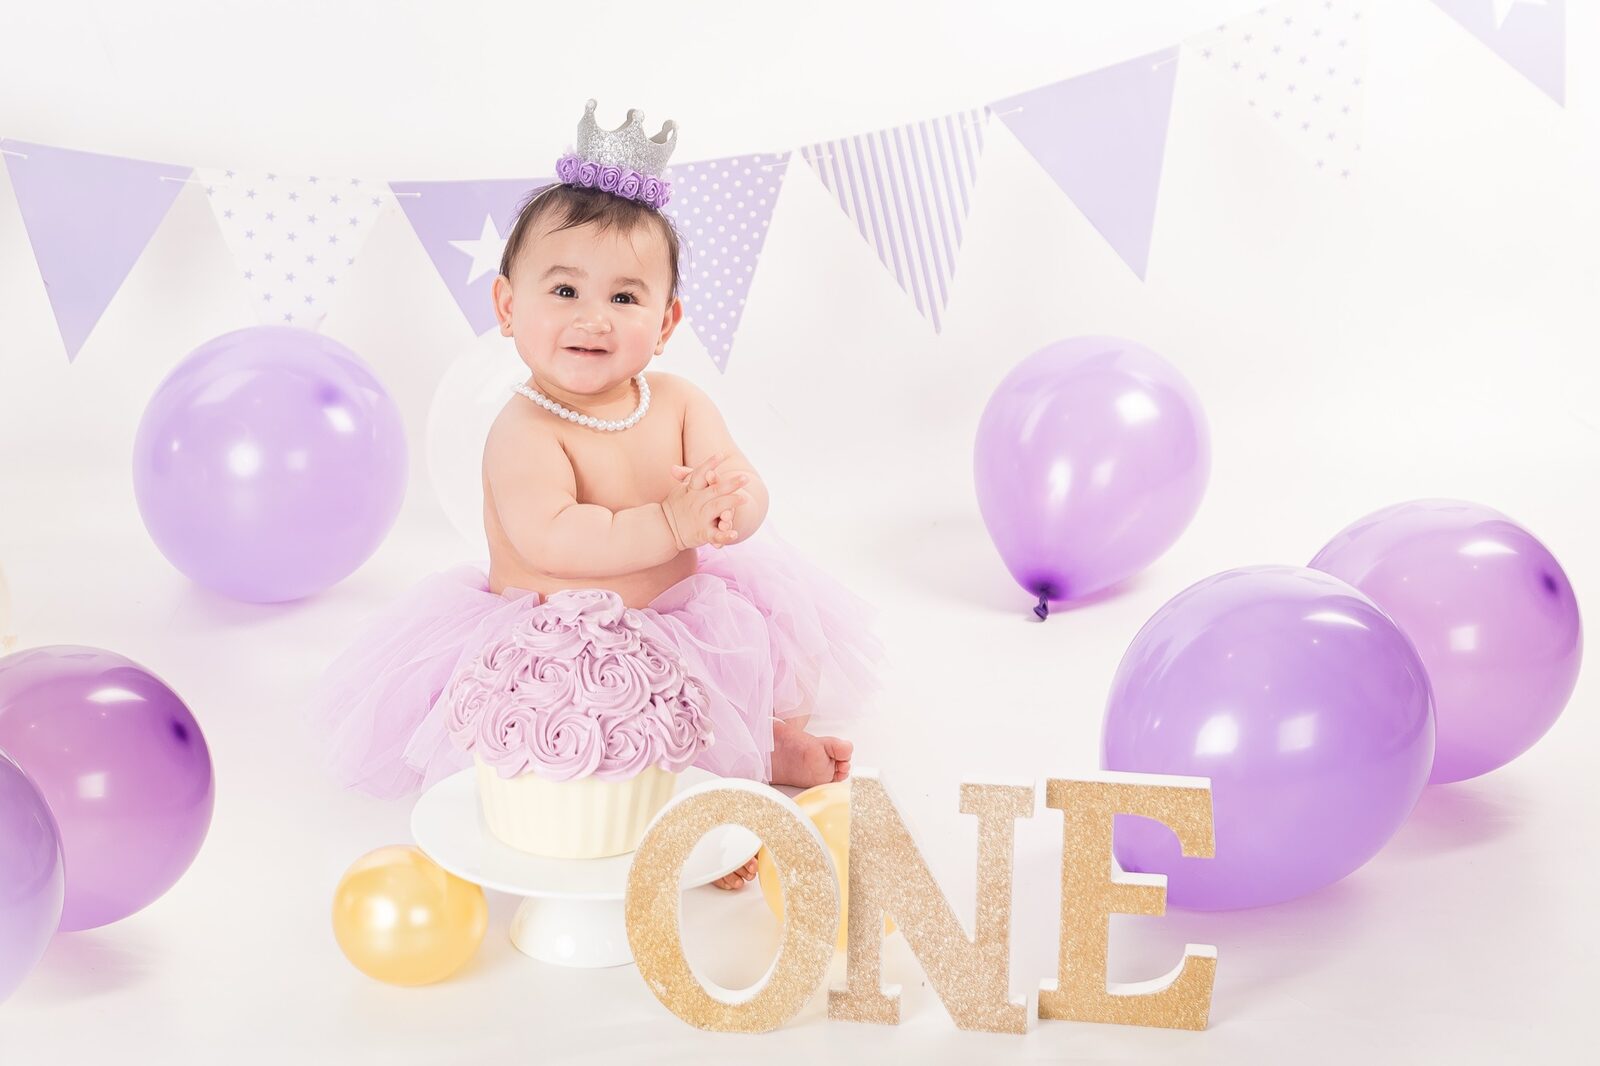
- Light-coloured buttercream frosting on a single-tier, 6–8 inch sponge is the gold standard for beautiful, smashable photos.
- Briefing your baker properly — and removing hard decorations before the smash begins — makes the difference between cinematic and chaotic.
Choosing the perfect cake smash birthday cake is one of the most underrated decisions you'll make for your baby's first birthday session. It sounds straightforward — order a cake, put it in front of your one-year-old, watch the magic happen. In reality, the cake you choose shapes everything: how your little one interacts with it, how the light bounces off the frosting, and how those priceless in-between expressions read in the final images. At Faithful Photography, our studio team in Glen Alpine and Gledswood Hills has watched the right cake turn a sticky afternoon into something genuinely cinematic — and the wrong cake turn it into a wrestling match nobody wins.
Whether you're planning your session with us in Campbelltown, Camden, Narellan, or anywhere across the Macarthur region, this guide will walk you through exactly what works, what doesn't, and how to brief your baker so your cake smash photography in Sydney comes together beautifully.
---What Actually Makes a Cake Smash Cake Work
A cake smash cake has three non-negotiable qualities, and none of them are about trends or Instagram aesthetics. They are structural integrity, the right size, and baby-safe ingredients. Get these right and everything else falls into place.
Structure: Soft Enough to Smash, Sturdy Enough to Stand
The cake must hold its shape on a highchair tray or on the floor, yet crumble easily when a one-year-old's tiny hands grab a fistful. That rules out dense mud cakes and anything reinforced with internal dowels. You want a tender sponge — vanilla, maple, or a gentle lemon — with a crumb that yields to toddler-level force.
Buttercream frosting is your best friend here. It smears gloriously in photos, it yields to baby pressure without resistance, and it photographs with beautiful texture. Fondant, by contrast, is stiff, rubbery, and plastic-looking in close-up shots. A one-year-old will peel it off and possibly choke on it. Leave fondant for wedding cakes.
Frosting Consistency Matters More Than You'd Think
Too firm and the frosting cracks rather than smears, producing harsh lines instead of that luscious, painterly mess you're after. Too soft and the cake slumps before your baby even touches it. A well-made Swiss meringue buttercream or classic American buttercream, applied in a generous but not excessive layer, hits the sweet spot every time.
---Size Is a Practical and Aesthetic Decision
This is where a lot of families get caught out. A gorgeous multi-tiered showpiece or a giant novelty cupcake looks stunning on a dessert table — but in a cake smash session, it becomes an obstacle. Here's what our photographers at Faithful Photography recommend.
- Diameter: 6 to 8 inches. Wide enough to look dramatic in frame, compact enough for a baby to reach and interact with from a seated position.
- Height: 3 to 4 inches. Short enough that there's no awkward stretching, tall enough to deliver visual presence.
- Tiers: One. A single tier keeps things stable and gives your baby a clear target.
- Extras: Smash cakes with jutting tiers, extended toppers, or elaborate structural features create awkward camera angles and limit genuine baby-cake interaction.
Simple doesn't mean boring. A single-tier round cake with beautiful frosting and maybe a number topper — removed before the smash begins — photographs brilliantly. The restraint is the point. Our team has styled and photographed hundreds of these sessions across South-West Sydney, and the cakes that produce the most stunning images are almost always the cleanest ones. For more inspiration on how we set up the whole session, read our guide on Cake Smash Studio Setup: Designing Sweetly Memorable Moments.
---Colour Choice: Where Aesthetics Meet Practicality
The colour of your frosting isn't just a style decision — it's a functional one. Cameras read light and contrast differently from the human eye, and certain colours photograph far better than others in the warm studio lighting we use at our Glen Alpine and Gledswood Hills studios.
Colours That Work
- White and cream — clean, timeless, reflects light beautifully without blowing out highlights.
- Soft pastels — blush pink, pale sage, soft peach, dusty lilac. These tones hold texture in photography and don't overwhelm the baby as the subject.
- Subtle ombré — two tones from the same colour family give depth without the chaos of a multi-hued design.
Colours to Avoid
- Chocolate or dark brown frosting — in close-up shots, it reads as muddy and flat. It also stains skin in ways that look far less charming on camera than you'd imagine.
- Saturated primaries — red, navy, bright orange. These can dominate the frame, pulling attention away from your baby's expressions.
- Black fondant or dark sugar decorations — a photographer's nightmare and a safety concern for little ones.
"The frosting should be the stage for your baby's chaos — not the headline act. One beautiful colour, beautifully applied, beats a circus of hues every single time."---
Ingredient Safety: What's Actually Going Into Your Baby's Mouth
This section matters more than any of the aesthetic advice above. A cake smash is, at its core, a baby eating cake. Often a lot of cake, in a very short time, with enthusiastic abandon. The ingredients need to be genuinely baby-friendly.
What to Avoid
- Artificial food dyes — linked to sensitivities in some children, and they don't add anything a natural colouring agent can't do better.
- Choking hazards — this includes hard fondant decorations, sugar pearls, chocolate chips, hard lollies, and novelty toppers left on during the smash.
- Nuts and nut products — many one-year-olds haven't been tested for nut allergies. Avoid entirely.
- Excessive sugar — grocery-store buttercreams are often loaded with refined sugar. A specialist baker can create a lower-sugar version that still photographs beautifully.
What to Request
Ask your baker specifically for a whipped or Swiss meringue buttercream rather than a standard American-style buttercream if you're concerned about sugar content. Natural food colouring from fruit or vegetable powders (freeze-dried raspberry for pink, matcha for green) is a brilliant option. And always have a conversation about allergens — your baker should be asking you these questions anyway.
---Ready to Book Your Cake Smash Session?
Faithful Photography's South-West Sydney studios in Glen Alpine and Gledswood Hills are fully styled and ready for your little one's big debut. We guide you through every detail — including the cake — so all you need to do is show up and enjoy the moment.
How to Brief Your Baker for a Cake Smash
Most bakers are talented, but they're not photographers. They don't know how buttercream reads under studio strobes, or that a fondant ribbon will end up in your baby's mouth within twelve seconds. Your job is to bridge that gap.
- Tell them what it's for. Explain it's a photography session, not a display cake. The cake will be attacked by tiny hands and photographed in obsessive detail up close.
- Specify the size. 6–8 inch diameter, single tier, 3–4 inches tall. Write it down.
- Specify the frosting. Buttercream, smooth or lightly textured finish. No fondant. Colour from the approved palette above.
- Discuss ingredient safety. Nut-free, dye considerations, and anything specific to your baby's dietary needs or allergies.
- Ask about decorations. If you want a number topper or a small floral decoration, confirm it can be removed before the smash — and that it's food-safe in case it isn't removed in time.
- Order with buffer time. Have the cake ready the day before your session if possible, and store it correctly so it arrives fresh and structurally sound.
A baker who has done cake smash commissions before will understand these requirements immediately. If yours hasn't, share this article with them — it covers everything they need to know.
---Matching the Cake to Your Session Theme and Styling
The cake doesn't exist in isolation. It lives inside a broader visual world that includes your backdrop colour, your baby's outfit, the props we use in the studio, and the overall mood you're after. Getting these elements to talk to each other is where the session goes from good to genuinely beautiful.
Let the Theme Live in Colour, Not Clutter
Themes work brilliantly when they're expressed through colour and texture rather than a pile of branded decorations. A safari theme? Warm caramel tones, simple buttercream, and a tiny felt animal beside the cake — done. A garden party? Pale sage frosting with pressed edible flowers. A fairy-tale theme? Blush ombré, simple piping, a small star topper for the posed shot.
The moment a cake smash cake becomes busy is the moment your baby's face stops being the hero of the image. See our guide on Cake Smash Outfits Ideas: Dress for a Playful First Birthday for how to carry the theme through your baby's clothing as well.
Coordinating With the Studio
When you book a cake smash photography session with Faithful Photography, we'll discuss the full visual plan together — backdrop colour, flooring, props, and how your cake fits into the scene. Families coming to us from Campbelltown, Camden, and Narellan can pop into the studio beforehand to see the space and talk through options.
---Before, During and After: Practical Session Tips
Even the most perfect cake smash birthday cake won't save a session if the timing and logistics are off. Here are a few practical pointers from our team.
Before the Session
- Feed your baby a proper meal roughly an hour before the session — hunger makes them frustrated, not playful.
- Don't give them cake beforehand. The novelty needs to land fresh.
- Make sure they've had a nap. A rested baby is a happy baby is a photogenic baby.
During the Session
Our photographers will always remove hard decorations and toppers before the smash begins. We place the cake at the right height and distance for your baby's reach. Don't stress if your baby is initially uncertain — most babies take two to three minutes to warm up, and those cautious first moments often produce the most expressive photographs.
After the Session
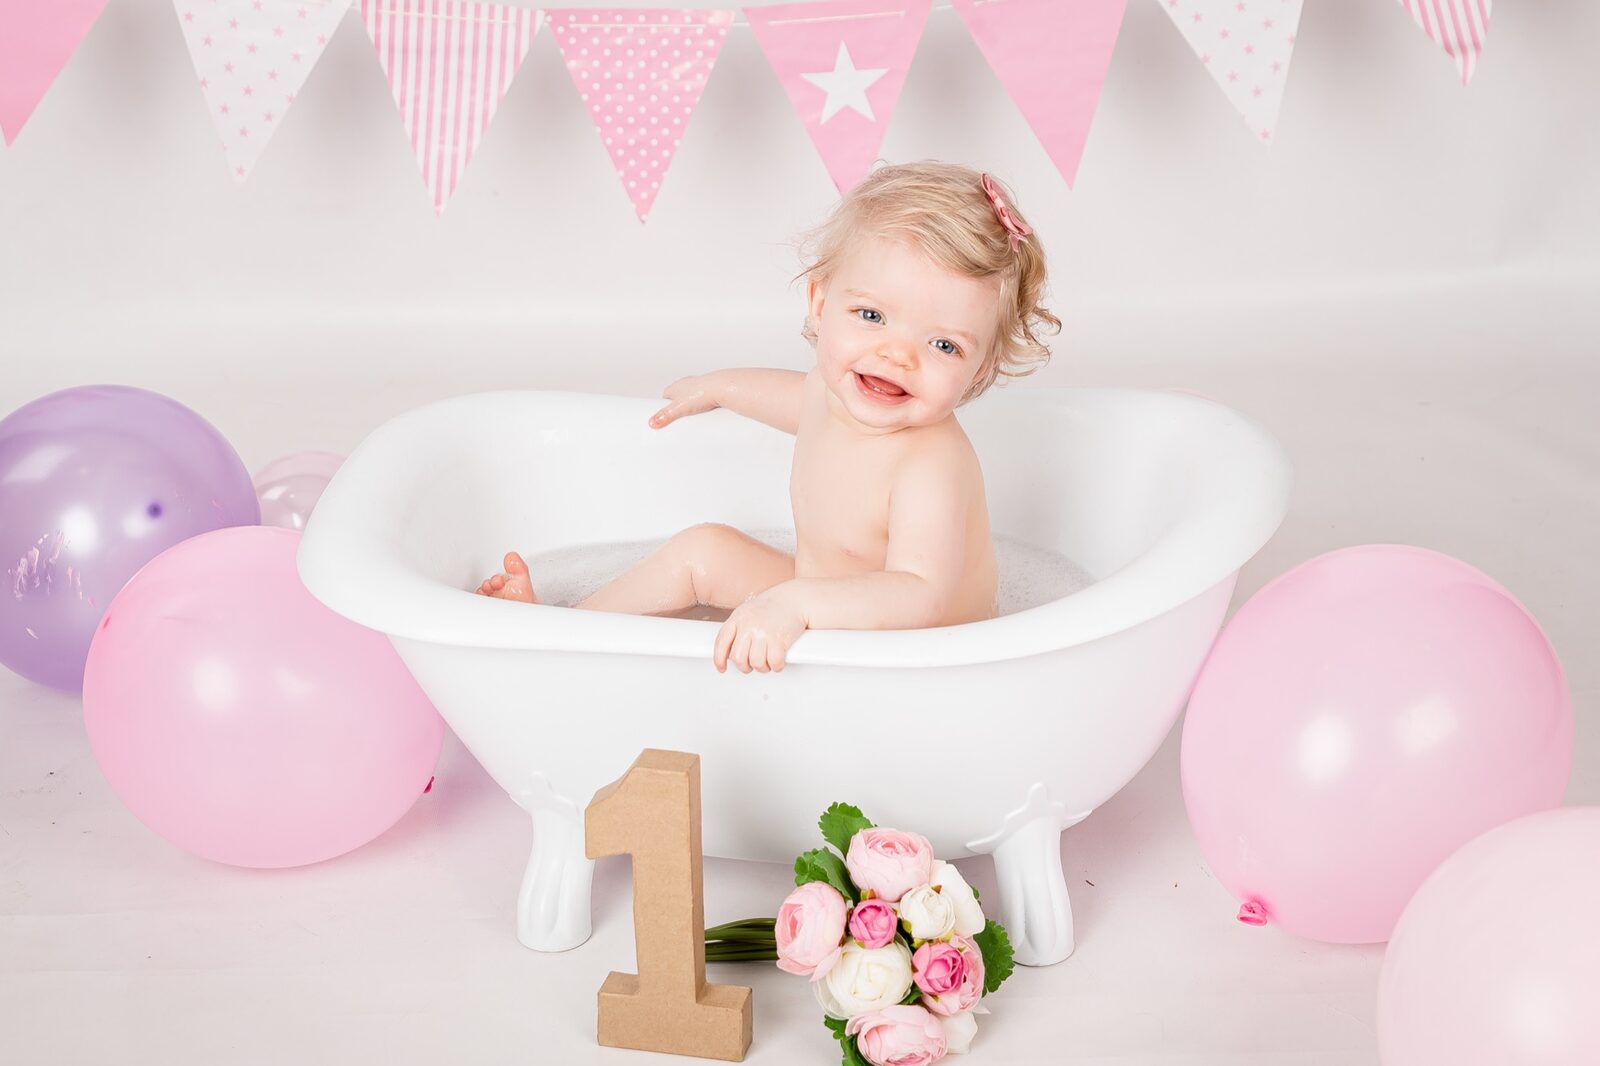
We handle the clean-up. You just need to bring a change of clothes for your little one and enjoy the experience. If you're thinking about capturing the wider family at the same session, ask us about combining the cake smash with a family photoshoot in Sydney — it's a popular choice among Macarthur-region families.
---Frequently Asked Questions
What size cake is best for a cake smash photography session?
A single-tier round cake, 6 to 8 inches in diameter and 3 to 4 inches tall, is the ideal size for a cake smash. It's compact enough for a baby to reach comfortably from a seated position, large enough to look visually impressive in frame, and stable enough to hold its shape until the smash begins.
Can I use a chocolate cake for a cake smash?
We'd recommend against chocolate frosting specifically. In close-up photography, dark brown frosting tends to read as muddy and flat, and it can stain your baby's skin in ways that look less charming on camera. A chocolate sponge with white or cream buttercream on the outside is a perfectly workable compromise if chocolate is important to you.
Is fondant safe for a cake smash?
Fondant is not recommended for cake smash sessions for two reasons. Firstly, it's a potential choking hazard — babies tend to pull off large pieces. Secondly, it looks stiff and plastic-looking in close-up photography, and it doesn't smear or interact with baby hands in the same visually appealing way that buttercream does. Stick with buttercream for both safety and aesthetics.
Where can I find a baker in South-West Sydney who specialises in cake smash cakes?
When you book a cake smash session with Faithful Photography, we're happy to point you toward bakers in the Campbelltown, Camden, and Narellan areas who understand the specific requirements of cake smash photography. Just ask when you enquire — it's one of the most common questions we receive, and we love connecting our families with the right local suppliers.
How far in advance should I order the cake smash cake?
Order at least one to two weeks before your session, particularly if you're working with a specialist or boutique baker. Have it ready the day before your session where possible, and store it at room temperature (not in the fridge) overnight so the buttercream stays soft and smashable. A cold buttercream firms up significantly and won't photograph with the same luscious texture.
Do I need to bring anything else to the cake smash session?
Bring a change of clothes for your baby (they will be thoroughly decorated in frosting by the end), any special outfit or accessories for the posed pre-smash shots, and the cake itself. We provide all studio props, backdrops, and styling. If you'd like to add hair and makeup services for the parents in attendance, we can arrange that too — just let us know when booking.
Visit Faithful Photography Today
Our studios in Glen Alpine and Gledswood Hills are purpose-built for beautiful, relaxed cake smash sessions — and our team handles every detail, from studio styling to post-session editing. Families across the Macarthur region, from Campbelltown to Camden and beyond, trust Faithful Photography to capture these fleeting first-birthday moments in images they'll treasure for a lifetime. Explore our session pricing or send us a gift voucher for the new parents in your life.