Key Takeaways
Preparation is paramount: Start with a well-hydrated canvas and use primer to ensure your makeup lasts and looks smooth.
Balance and blend: Opt for medium coverage, blend meticulously, and use matte finishes strategically to avoid flashback and harsh lines in photos.
Define features subtly: Enhance your eyes, brows, and lips with definition rather than heavy colour, adapting your technique for different lighting conditions.
Capturing life's moments through photographs is a cherished tradition, whether it's a casual selfie with friends, a family gathering, or a significant event. While professional photography by experts like Faithful Photography ensures stunning results, knowing how to do your own makeup for photos can make a huge difference in everyday snaps too. You want to look your best, feel confident, and ensure your features truly shine through the lens.
This comprehensive guide will walk you through the essential steps and techniques for applying makeup that translates beautifully in any photograph. We'll cover everything from skin preparation to finishing touches, helping you achieve a camera-ready look that feels natural and enhances your unique beauty.
Prepping Your Canvas: Skincare and Primer for Photo Makeup
The secret to any flawless photo makeup look begins long before you pick up a brush. A well-prepared canvas ensures your makeup applies smoothly, lasts longer, and photographs beautifully. Investing time in your skincare routine is crucial for achieving truly camera-ready skin.
Hydration is Key for Photography
Dehydrated skin can make makeup appear patchy and dull in photos. Always start with a clean, moisturised face. This creates a smooth surface for foundation and helps prevent your skin from absorbing moisture from your makeup, which can lead to creasing or caking.
Cleanse gently: Use a mild cleanser suitable for your skin type.
Tone and treat: Apply any serums or treatments, allowing them to fully absorb.
Moisturise thoroughly: Choose a non-greasy moisturiser that hydrates without leaving a heavy residue. Give it a few minutes to sink in before moving on.
Don't forget the lips: Apply a hydrating lip balm early in your routine so it can absorb while you do the rest of your makeup.
The Power of Primer for Photos
A good primer for photos acts as a barrier between your skin and makeup, creating an even texture and helping your look last. It can also address specific concerns like redness, large pores, or excess oil, which are often accentuated by camera flashes.
Choose a primer based on your skin's needs. A mattifying primer is excellent for oily skin, while a hydrating primer suits drier complexions. Silicone-based primers can blur imperfections, making your skin look smoother in photos. Apply a thin, even layer across your entire face, paying extra attention to areas prone to shine or visible pores.
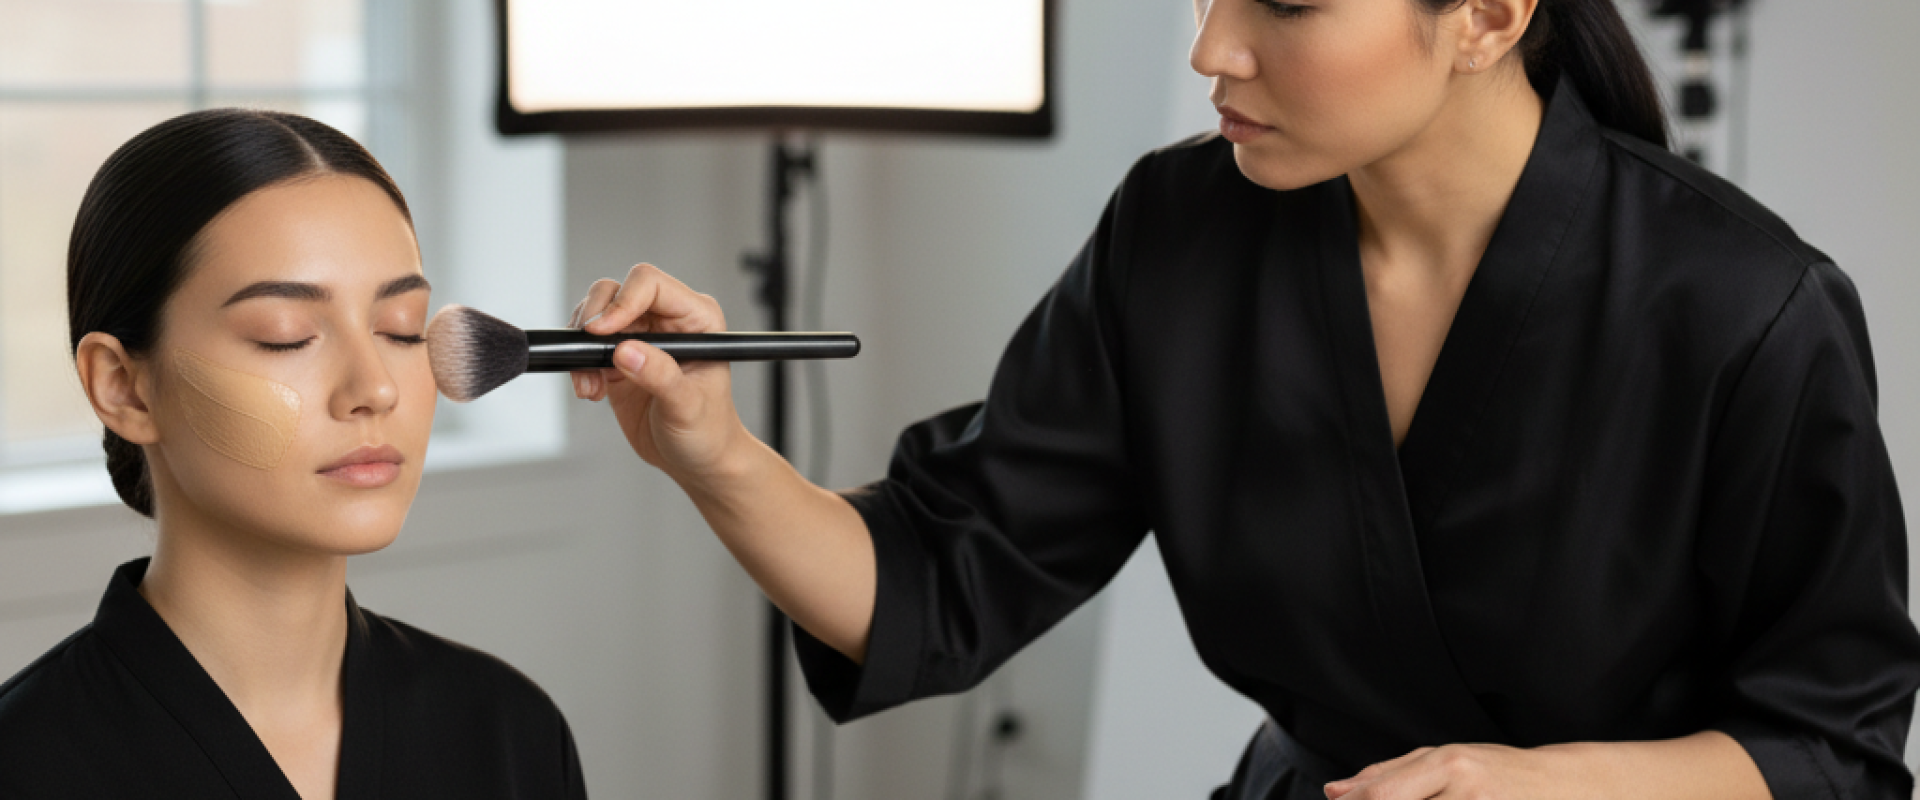
Flawless Base: Foundation, Concealer, and Powder for Camera-Ready Skin
Achieving a flawless photo base is about creating an even skin tone without masking your natural features. The right products and application techniques will ensure your skin looks radiant and natural, not heavy or cakey, in every shot. This is where your base truly sets the stage for success.
Choosing the Right Foundation for Photos
When selecting foundation for photos, steer clear of formulas with SPF, as zinc oxide and titanium dioxide can cause a white cast or "flashback" in flash photography. Opt for a medium-coverage, buildable foundation that matches your skin tone perfectly. Test shades in natural light on your jawline, not your hand.
Apply foundation evenly with a damp beauty sponge or a foundation brush, blending outwards towards your neck and hairline. The goal is to unify your skin tone, not to completely cover it. Light layers are always better than one thick application for a natural finish.
Strategic Concealing for Brightness
Concealer is your best friend for targeting specific areas without overdoing your entire face. Use a colour-correcting concealer for dark circles (peach or orange tones) and then a skin-toned concealer for blemishes or redness. Apply it sparingly to areas that need extra coverage.
For under-eyes, choose a shade one or two tones lighter than your foundation to brighten. Gently pat it in with your ring finger or a small, damp sponge. Remember, less is more to avoid creasing, especially in the delicate under-eye area, which cameras love to highlight.
Setting Your Base with Powder for Photography
Setting your foundation and concealer is crucial for longevity and to prevent unwanted shine, especially in photos. A translucent setting powder for photos is ideal as it won't add extra colour or coverage. Focus on your T-zone and under-eyes, where oil tends to accumulate and creasing occurs.
Use a fluffy brush to lightly dust powder over your face, or a damp sponge for "baking" in areas like under the eyes for extra staying power. Be mindful not to over-powder, as this can make your skin look flat or dry in photos. The aim is to reduce shine, not eliminate all natural luminosity.
Bringing Dimension: Contour, Blush, and Highlight for a Dynamic Look
Without dimension, your face can appear flat in photographs. Adding contour, blush, and highlight is essential for bringing back natural shadows and light, creating a more dynamic and sculpted look. These steps are key for photo contouring tips and enhancing your natural bone structure.
Sculpting with Contour and Bronzer
To add dimension in photos, use a matte contour or bronzer a couple of shades darker than your skin tone. Apply it to the hollows of your cheeks, along your jawline, and lightly on your temples. The key is to blend, blend, blend, ensuring there are no harsh lines. This creates a subtle shadow effect that defines your features.
For a natural look, choose a cool-toned contour powder for shadows and a warmer bronzer for a sun-kissed glow. Avoid anything too shimmery in your contour, as this can look unnatural in flash photography. Focus on creating definition rather than a drastic change.
A Touch of Colour with Blush for Photography
Blush brings life and a healthy flush back to your face. Choose a shade that complements your skin tone – peaches and soft pinks work well for most. Apply it to the apples of your cheeks, blending upwards towards your temples. A cream or liquid blush can offer a more natural, dewy finish, while powder blush provides a classic look.
For photos, it's often better to apply slightly more blush than you would for an everyday look, as cameras can sometimes wash out colour. However, always ensure it's well-blended to avoid any obvious stripes of colour. A vibrant yet subtle cheek colour is perfect for a blush for photography.
Strategic Highlighting for Radiance
Highlighter catches the light, drawing attention to your best features. Apply a subtle, finely milled highlighter to the high points of your face: the tops of your cheekbones, the bridge of your nose, your cupid's bow, and just under your brow bone. Avoid anything with chunky glitter, which can look unnatural in photos.
Cream or liquid highlighters often blend more seamlessly for a natural glow, while powder highlighters can offer more intensity. Remember, the goal is a healthy luminosity, not an overly shimmery or greasy appearance. This touch of radiance will make your skin look fresh and vibrant.
For truly memorable photographs, it's not about hiding imperfections, but about enhancing your natural beauty. The camera loves confidence, and your makeup should simply be an extension of that.
Eyes That Pop: Brows, Eyeshadow, and Liner for Photo-Ready Eyes
Your eyes are often the focal point in photographs, conveying emotion and drawing the viewer in. Mastering eye makeup for photos means defining and enhancing them without making them look too heavy or overdone. A well-executed eye look can truly make your features pop.
Framing with Brows for Definition
Well-groomed and defined brows frame your face beautifully and add structure to your overall look. Fill in any sparse areas with a brow pencil, powder, or pomade that matches your natural brow colour. Use short, hair-like strokes for a natural finish, then brush them through with a spoolie to soften any harsh lines.
Avoid overly dark or blocky brows, as these can appear harsh in photos. The goal is to enhance your natural shape, making your eyes look more awake and polished. Defined brows are a subtle yet powerful element of any photo-ready makeup.
Eyeshadow Techniques for Depth
For general photos, neutral eyeshadows like browns, taupes, and soft greys are always a safe bet. They add depth and definition without being distracting. Apply a matte transition shade in your crease, a slightly darker matte shade in the outer corner, and a shimmery lighter shade on your lid and inner corner.
Matte is your friend: Matte eyeshadows tend to photograph better than overly shimmery or glittery ones, which can sometimes look flat or create unwanted reflections.
Blend, blend, blend: Seamless blending is key to avoiding harsh lines and ensuring a professional finish.
Avoid red tones: Be cautious with red-toned eyeshadows if you're prone to redness around your eyes, as they can make you look tired or sickly in photos.
Defining with Liner and Mascara
Eyeliner and mascara are essential for making your eyes stand out. A thin line of black or dark brown eyeliner along your upper lash line can make your lashes appear fuller. For a softer look, you can smudge a dark brown eyeshadow along the lash line instead of liquid liner.
Finish with two generous coats of volumising and lengthening mascara on both your upper and lower lashes. Black mascara usually provides the most definition for photos. If you're comfortable, a few individual false lashes or a strip lash can dramatically open up the eye, creating truly photo-ready eyes.
Lush Lips: Colour and Definition for a Complete Look
Your lips complete your makeup look, adding a touch of personality and colour. Choosing the right lip product and ensuring it stays put is important for any photo opportunity. The aim is to have long-lasting lip makeup that looks vibrant and well-defined.
Choosing Your Lip Shade for Photos
For most photo situations, a nude, rose, or berry lip shade works beautifully. These colours enhance your natural lip tone without being too distracting. Avoid overly glossy finishes, as they can sometimes look overly reflective or even greasy in photos. Matte or satin finishes tend to photograph best, providing rich, even colour.
If you prefer a bold lip, ensure the colour is applied perfectly and is long-wearing. Bright reds or deep plums can look stunning, but require more precision and touch-ups. Consider your outfit and the overall mood of the photo when selecting your lip colour for photos.
Defining Your Pout with Liner
Lip liner is a game-changer for photos. It helps define your lip shape, prevents lipstick from bleeding, and provides a base for longer wear. Choose a liner that matches your lipstick shade or your natural lip colour. Outline your lips, then gently fill them in with the liner before applying your lipstick.
This technique creates a more polished and defined lips look, ensuring your pout stands out clearly in photographs. For extra longevity, blot your first layer of lipstick with a tissue, then apply a second layer.
Ready to capture your family's precious moments?
Let Faithful Photography create timeless memories you'll cherish forever.
Setting It Right: Long-Lasting Finish for Your Photo Makeup
You've put in the effort to create a beautiful makeup look; now it's time to ensure it lasts through all the photos, smiles, and potential Sydney humidity. A good setting routine is essential for long-wear makeup for photos and maintaining a fresh appearance.
The Importance of Setting Spray
A high-quality makeup setting spray is the final, crucial step in your photo makeup routine. It melts all the powder products into your skin, creating a more seamless finish and locking everything in place. This helps prevent makeup from smudging, fading, or settling into fine lines throughout the day.
Hold the bottle about 20-30 centimetres from your face and spray in an 'X' and 'T' motion. Allow it to air dry naturally. This step is particularly beneficial for outdoor photos or events where you need your makeup to withstand various conditions.
Touch-Up Essentials for Photos
Even with the best setting spray, a few touch-ups might be necessary, especially for longer events. Prepare a small touch-up kit with essentials like blotting papers (to absorb excess oil without disturbing makeup), a compact powder, your lipstick, and perhaps a small concealer.
Blotting papers are fantastic for reducing shine without adding more product. A light dusting of powder can then refresh your T-zone. Being prepared means you can quickly refresh your look and stay camera-ready at all times.
Common Makeup Mistakes to Avoid for Photos
While makeup can enhance your features, certain techniques can actually work against you in photographs. Knowing these common makeup mistakes for photos can help you avoid looking anything less than your best.
Avoiding Flashback in Photography
As mentioned, products containing SPF (titanium dioxide, zinc oxide) or excessive silica powder can cause a white cast in flash photography, making your face look ghostly. This is a common issue known as flashback prevention. Always check your foundation, concealer, and powder for these ingredients if you know flash will be used.
Also, avoid applying too much translucent powder. While it sets your makeup, an excess amount can also lead to flashback. Use a light hand and ensure it's well-blended.
Over-Application and Harsh Lines
One of the biggest pitfalls is applying too much makeup. Heavy layers of foundation, concealer, or powder can look cakey and unnatural in photos, accentuating fine lines and texture. The camera often exaggerates, so what looks subtle in person can appear heavy on film.
Similarly, harsh lines from unblended contour, blush, or eyeshadow can be very obvious. The key to natural photo makeup is seamless blending. Every product should transition smoothly into the next, creating a soft, diffused look.
Too much shimmer: While a subtle highlight is great, excessive shimmer or glitter can look greasy or distracting in photos, especially under bright lights.
Unmatched foundation: A foundation that doesn't match your neck can create a visible line, making your face appear disconnected from your body.
Dark under-eyes: While concealing is good, using a concealer that is too light can make your under-eyes look like white circles in photos.
Adapting Your Look for Different Lighting Conditions
The type of light you're being photographed in dramatically impacts how your makeup appears. What looks stunning in bright daylight might be too subtle under artificial lights. Understanding how to create makeup for different lighting ensures you always look your best.
Natural Daylight Photos
Natural daylight is often the most forgiving, but it also reveals everything. For daylight photo makeup, focus on a fresh, luminous look. Use lighter coverage foundation, subtle contouring, and a healthy flush of blush. Opt for natural tones in your eyeshadow and a soft lip colour.
Avoid anything too heavy or matte, as natural light can make these textures look dull. Embrace a dewy finish (without being greasy) for a radiant, healthy glow that complements the soft, even light.
Indoor Artificial Light and Flash
Artificial lighting, especially fluorescent or harsh overhead lights, can wash out your features and create unflattering shadows. For these conditions, you might need to apply slightly more definition to your features. Enhance your contour and blush a touch more than usual.
If flash photography is expected, strictly adhere to the no-SPF rule in your base products. Matte finishes are generally safer for flash, as they absorb light rather than reflecting it. Make sure to blend everything meticulously, as harsh shadows can make unblended areas more noticeable.
Low Light and Evening Photos
In low light or evening settings, your makeup needs a bit more intensity to show up. This is where you can be a little bolder with your choices. Deepen your eyeshadow, add a more dramatic eyeliner, and opt for a richer lip colour for evening photo makeup.
Subtle shimmer can work well in low light, adding a touch of glamour without being overpowering. Remember to blend thoroughly, as shadows can still reveal harsh lines. The goal is to create definition that shines through the dimmer environment.
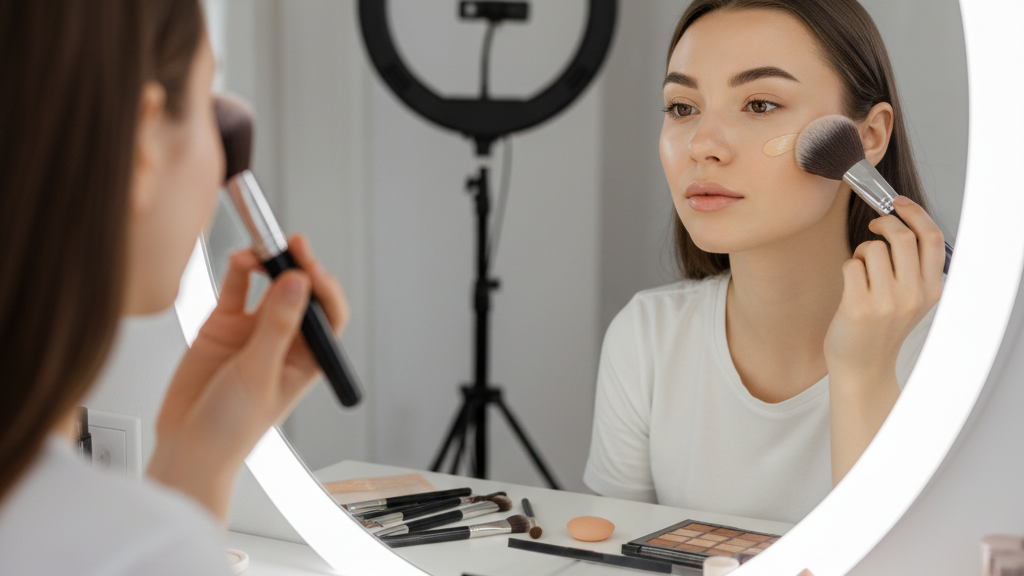
Pro Tips for a Camera-Ready Finish
Beyond the application techniques, a few overarching principles can elevate your makeup for any photo. These camera-ready makeup tips are often employed by professionals to ensure a truly polished and harmonious look.
Less is Often More for Photos
It might sound counterintuitive, but for most photos, especially casual ones, less makeup often looks better. Heavy layers can appear mask-like and age you. Focus on strategic placement and building thin layers rather than caking on product. The aim is to enhance, not to hide.
This approach allows your natural skin to show through, making you look fresh, authentic, and genuinely radiant. It's about finding that sweet spot of enhancement without overdoing it, leading to truly professional photo makeup results.
Blend, Blend, Blend for Seamlessness
This cannot be stressed enough: blending is the most critical step for beautiful photo makeup. Harsh lines from foundation, concealer, contour, blush, or eyeshadow are magnified by the camera. Take your time to blend every product seamlessly into your skin and into each other.
Use clean brushes and sponges, and don't be afraid to go back with a clean brush to buff out any edges. A truly seamless blend ensures your makeup looks natural and professional, rather than like separate layers of product.
Don't Forget Your Neck and Décolletage
Your face isn't the only part of you that will be in photos. Ensure your foundation and powder are blended down your neck and, if exposed, onto your décolletage. This prevents an obvious "mask" effect and ensures your skin tone is consistent throughout.
A light dusting of bronzer on your neck and chest can also unify your skin tone and add a healthy glow, especially if your face makeup is slightly different from your body's natural colour. This attention to detail creates a cohesive and polished look from head to shoulders.
Frequently Asked Questions
What's the most important step for photo makeup?
The most important step is skin preparation – cleansing, moisturising, and priming. A smooth, hydrated canvas ensures your makeup applies flawlessly and looks natural in photos, preventing issues like patchiness or caking.
Can I use SPF in my foundation for photos?
It's generally recommended to avoid foundations and powders with high SPF for photos, especially if flash photography is anticipated. Ingredients like zinc oxide and titanium dioxide can create a white cast or "flashback," making your face appear lighter than your body.
How do I avoid looking "flat" in photos?
To avoid looking flat, use contour, blush, and highlighter strategically. Contour creates shadows to define features, blush adds a healthy flush, and highlighter brings back luminosity to the high points of your face. Blending is key for a natural, dimensional look.
Should I use matte or dewy finishes for photos?
Matte finishes tend to be safer for flash photography as they absorb light, preventing shine. However, a natural, subtle dewiness can look beautiful in natural light. A good compromise is a satin finish, or using matte products in oily areas and a subtle highlight for luminosity.
How much makeup is too much for a casual photo?
For casual photos, less is often more. Focus on enhancing your features rather than heavy coverage. A light to medium foundation, defined brows, a touch of blush, and a natural lip colour are usually sufficient. The goal is to look like an enhanced version of yourself, not a different person.
What's the best way to touch up makeup during a long event?
Carry blotting papers to absorb excess oil without disturbing your makeup. A compact powder can be lightly dusted over shiny areas. Reapply lipstick as needed, and a quick refresh of concealer under the eyes can brighten your look. Avoid adding heavy layers, as this can lead to caking.
Visit Faithful Photography Today
For professional newborn, maternity, family, or corporate headshot photography in Glen Alpine, Sydney, trust Faithful Photography to capture your most cherished moments.