Journal · Maternity · 25 December 2020 · 5 min read
Maternity Photography Lighting
Maternity photography may be more challenging than other types of photography, but it is also rewarding. If you are new to photography or are looking for tips on how to shoot maternity photographs, we have one word for you – lighting. In fact, good lighting can make or break most photographs, no matter what type […]

Maternity photography may be more challenging than other types of photography, but it is also rewarding.
If you are new to photography or are looking for tips on how to shoot maternity photographs, we have one word for you – lighting. In fact, good lighting can make or break most photographs, no matter what type of professional cameras and tools you use.
The reason for maternity photography being slightly more challenging is because you have to focus on several aspects at once. The most crucial aspect of any maternity shoot is the mother and her engorged belly. Capturing the aesthetics of this along with the other elements of expression, background, and lighting, can turn a maternity photograph into a masterpiece.
In this guide, we will talk about one of the most important aspects of maternity photography – lighting. So, sit back and relax as we share some top tips to help you with your upcoming shoot.
Without further ado, let’s begin!
Maternity Photography Lighting Tips
Maternity photography can be exciting for both the photographer and the mother. The large, pregnant belly, the mother’s glowing expression, the proud father – all these elements add up to create some fantastic photographs.
Let us take you through a few helpful tips that will help you click the best maternity pictures.
1. Outdoors VS Indoors
Whether you decide to conduct a maternity shoot outdoors or in a studio can make a significant difference in how the lighting turns out. If you decide to shoot outdoors, make sure you take advantage of natural light. More often than not, natural light photographs look exceptionally better compared to those clicked under studio lights.
If you plan your maternity shoot indoors or inside a studio, there are a few things to keep in mind. First, it is possible to use natural light even in a studio setting. Make sure the photographer has a flash and reflector. These small tools can help draw attention to the baby bump, which is the focus of any maternity shoot.
2. The Right Lenses
Let’s get one thing straight – you can complete a maternity photoshoot with absolutely any camera and lens. That being said, certain lenses may cause distortion, making the mom-to-be look wider than she is. Now, this can be very unflattering!
It is natural to want to experiment with lenses, angles and lighting. However, we can give you a little tip that might work excellently every time – try using an 85mm or 35mm lens.
On the plus side, most lenses between 24-70mm work beautifully for tilt angle shots, portraits, overhead shots and zoom. These lenses tend to capture the mother and her pregnant belly in a flattering way while still capturing essential elements of the background.
The kind of lens you use with certain lighting can also make a big difference in how the photographs turn out. Use a long lens while shooting outdoor maternity sessions to draw focus to the subject in the foreground. Be careful while using super-wide lenses, as they may distort the subject.
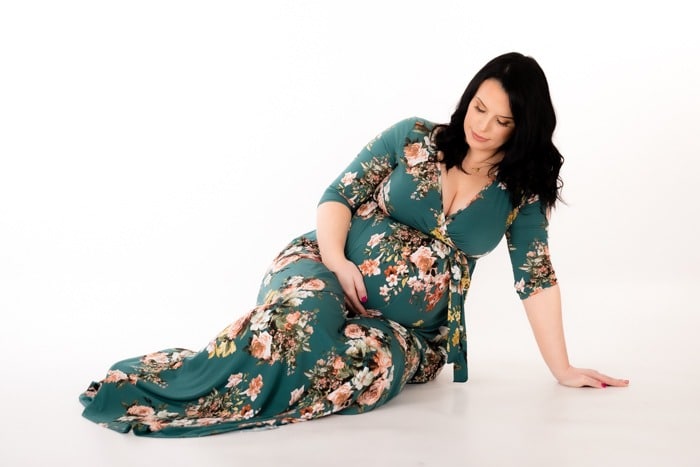
3. Using A Backdrop
Our next tip can work exceptionally well if you’re planning a maternity shoot in the studio. Opt for a neutral backdrop in muted colours. Black, white or beige work great. Dress up the mom-to-be in bright shades as a contrast to the muted background.
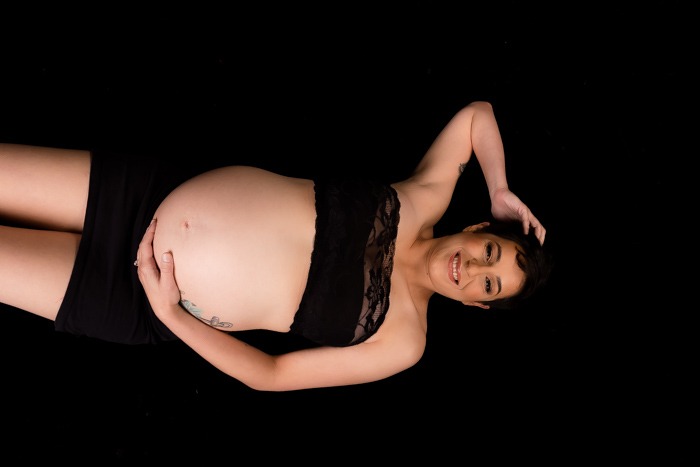
Now, position the subject in profile, so you get a good view of her convex belly. It is now time to play with angles and lighting. Use natural light as much as possible to enhance the lines and shadows of the subject’s face and body. However, to draw focus on the stomach, use bright studio lights.
By using a muted backdrop and bright studio lights, you will draw attention to the main subject of the image – the mother’s belly.
4. Have The Right Equipment
Having the right equipment at hand could make a world of difference in how your photographs turn out. If your budget allows it, opt for a couple of great strobes, flashes and a battery pack. Now, you can achieve similar results using many smaller flashes at once, but it isn’t always the most practical solution.
Carrying a battery pack and one super-powerful flash or strobe can help you achieve the right lights and shadows needed to transform an ordinary photograph. Keep in mind, the focus lies on the mother-to-be and her stomach, so ensure that you focus the light in the appropriate angles.
5. Light Setup
Depending on your subject, the lights you own, the studio setup and the clients desired results, there are a number of light setups to experiment with. As a general rule, it is important not to overwhelm the mom-to-be with too many bright lights. These can cause unnecessary anxiety and exhaust the subject.
It is also advantageous to keep a couple of fans around or turn on air-conditioning. This may not be possible in the case of outdoor maternity shoots, so make sure that you give adequate breaks to the subject and give them time to eat and drink something between shots.
To achieve the best results from a maternity photography session, try and focus the lights around (not on) the face and the stomach area. Adding direct light to the face isn’t ideal, as it can bring out blemishes or cause the subject to start sweating (or putting on a strange expression).
Conclusion
Any photographer will tell you that one of the most vital elements of photography is lighting.
Maternity photography can be a fun project, and the results can be striking when lighting is used correctly. Make sure to constantly communicate, so both parties involved know what is expected of each other. Remember – natural light is always preferable to an artificial one.
That being said, natural light isn’t always readily available. For these cases, ensure that you have the right tools and light setup to help you achieve stunning maternity photographs. And most importantly, try to always keep the subject comfortable.
With that, we will now take our leave. Take care and happy shooting!